Home Pages
Download Manual![]() This feature is available to Site Managers.
This feature is available to Site Managers.
Home pages give easy access to course content and other information users need. They can also be used to communicate important information, like news or announcements. Site managers can create home pages to provide a custom user experience in the LMS. You can have a unique home page for each user group or share home pages among groups. A default home page is displayed for all user groups not otherwise assigned to a specific home page. A user group can only belong to one home page, but users may belong to multiple users groups and have access to multiple home pages. Users with multiple home pages may change their home page using the drop-down on the home page.
- Log in with a Site Manager account.
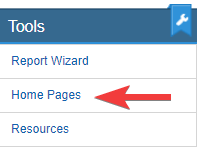
- Select Home Pages from the Tools menu on your home page.

Create a Home Page
Site Managers can create new home pages to display to selected user groups.
- Navigate to Home Pages.
- Select Create from the Options menu. If you cannot see the menu, show the Tool Panel.

- Design your page using the content editor.
- Save.
- Optionally assign user groups (see Add or Remove Home Page User Groups) or opt to keep all groups in the default home page.
- Brand the home page with a logo by setting a banner.
- Optionally set a page priority.
Add or Remove Home Page User Groups
Site Managers can control which home page is visible to the user groups in the system.
- Navigate to Home Pages.
- Select Set User Groups to the right of the home page.

- Add or remove groups.
- Save.
Set Home Page Banner
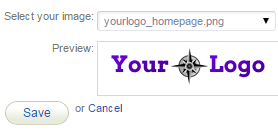
Site Managers can brand home pages by adding a banner (e.g. a company logo). Banners are configured for an ideal width of 160px and height of 78px. If you select an image that exceeds the maximum restrictions, the system will resize accordingly. Resized images are saved as a new file with the text "_banner" appended to their original name. The banner will appear on the home page, as seen below:

- Navigate to Home Pages.
- Select Set Banner to the right of the home page.

- Select an image from the dropdown menu. You may select an image already uploaded to the Media Library or upload it from the Edit Home Page screen.

- Save.
Home Page Priority
Site Managers can enter or change the priority value of each home page. Priorities are useful in cases where users have access to multiple home pages. The higher the priority value, the more likely that home page is to be displayed first when the user logs in.
- Navigate to Home Pages.
- In the Priority field, enter a number from 1 - 100.

- Save.
![]() Priorities can only be added to home pages that have user groups asssigned.
Priorities can only be added to home pages that have user groups asssigned.
Home Page Availability
Site Managers can manage home page availability using several methods. Select a method below to learn more.
Change the status of home pages. An inactive home page remains in the system but can no longer be seen by users.
![]() Users are impacted when a home page is made inactive. It is best practise to reassign user groups from an inactive home page.
Users are impacted when a home page is made inactive. It is best practise to reassign user groups from an inactive home page.
- Navigate to Home Pages.
- Select the page Status to toggle it to active or inactive.

User groups that belonged to a deleted page will be added to the Default Home Page. Note that the default home page cannot be deleted.
![]() Deleted home pages are permanently removed from the system.
Deleted home pages are permanently removed from the system.
- Navigate to Home Pages.
- Select the Delete Home Page link to the right of the home page.

- Select Yes when prompted to confirm.
Edit Home Pages
![]() This feature is available to Site Managers and Course Authors, depending on system configuration.
This feature is available to Site Managers and Course Authors, depending on system configuration.
- Navigate to Home Pages.
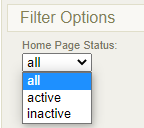
- Optionally filter to show only active or inactive home pages. If you can't see the filter options, show the Tool Panel.

- Select the name of the home page to open the content editor.

- Use the content editor to make desired changes.
- Save.
- Log in and select Edit button at the top of the page.
- Use the drop down menu to select a home page if you belong to multiple pages.
- Use the content editor to make desired changes.
Change the Home Page Welcome Message
When a user enters the system, there is a welcome message at the top of their page. Site Managers can customize this message using a dictionary label. The user's name is automatically populated.

- Navigate to Dictionaries.
- Follow the steps in Edit Dictionaries.
- Enter new text for the label: word_welcome (seen in the image above as "Welcome").
- Enter new text for the label: welcome_message (seen in the omage above as "to your online training centre."
- Save.

