Manage Storefront Items
Download ManualThe storefront is automatically populated with product information within the system making the posting of new products to the storefront quick and easy. You can post anything in the product library to your storefront. Extensions and bundles of products may be placed on the storefront for purchase as well.
Add Products to Storefront
- Select a product to open it.
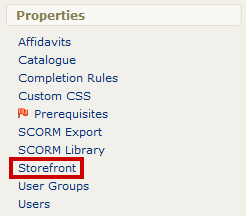
- Select Storefront from the properties menu to open the Manage Storefront page. If you cannot see the menu, show the Tool Panel.
- Select Create to open the Add Store Item page.

- Fill out the Add Store Item form. You must place a store item into at least one category and make it active for it to be seen on the storefront.
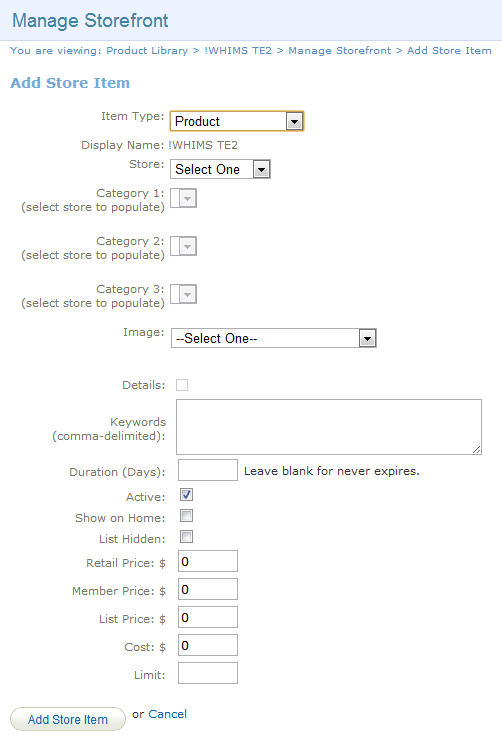
- Select Add Store Item. The item will be added to the storefront and you will be returned to the Manage Storefront page where you can review the posted item.
![]() Sell Multiple Versions of the Same Product
Sell Multiple Versions of the Same Product
You can create another copy to sell or create an exception for the same product.
Add Bundles to Storefront
- Log in with a Site Manager account.
- Open the Bundles management page.
- Select the Storefront button from detailed view or the Edit Storefront icon from list view.
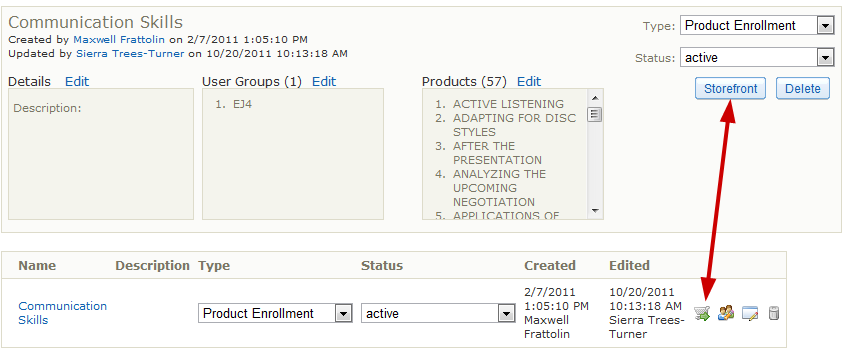
- Select Add Storefront Item.
- From here the process is the same as it is for adding products to the store (see Add Products to Storefront).
![]() Add Products to Existing Bundles
Add Products to Existing Bundles
- When you add a new product to an existing bundle, it is automatically updated to the storefront items.
- If you add products to the bundle after an individual purchased it, the individual is not automatically given access to the newly added products.
Add Exceptions to Storefront
Site managers may choose to publish an exception to the storefront so that a customer can purchase extended access to a product that has expired for them. You can even set a limit as to how many times that exception may be purchased by each customer by using the Limit field. The process for adding exceptions to the store is exactly the same as adding products. Simply select “product exception” from the drop-down menu under the item type. Individuals must be on the enrolment list to purchase a product exception, i.e., they must have first purchased the product itself or have been registered manually within the system.
The process for adding exceptions to the store is exactly the same as adding products (see Add Products to Storefront). Individuals must be on the enrolment list to purchase a product exception, i.e., they must have first purchased the product itself or have been registered manually within the system.
Email Notifications for Exceptions
Email notification may be enabled to remind enroled individuals about an expiring product with a link to purchase an exception. Provided that the exception is available on the storefront to be purchased, the product expiration notice will include a link to purchase the related exception. This is done automatically based on the conditions below.
- An extension has to have been created in the storefront.
- The preset text [[ Extension List ]] is added to the body of the email.
The link is usually just a standard link to automatically add the product into the cart. When the user clicks the link, they are brought to the storefront with the extension added to their cart.
![]() Product Exception Tips
Product Exception Tips
- Exceptions are only applicable for storefront products that have a duration or expiry.
- The product does not need to be on the storefront to publish an exception for it on the storefront.
- Extra time will be added to the original expiry, so only enter the duration days for the exception itself, not a total.
Edit Storefront Items
- Select the product name to open it.
- Select Storefront under the properties menu to open the Manage Storefront page.
- Select the Edit Icon next to the item.
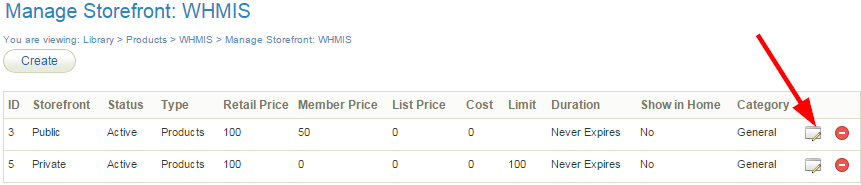
- Make the necessary changes.
- Select Update Store Item at the bottom.
Delete Storefront Items
- Select the product name to open it.
- Select Storefront under the properties menu to open the Manage Storefront page.
- Select the Delete Icon next to the item.

- Select Yes in the confirmation window.

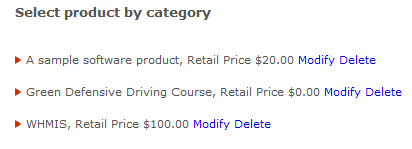
View Storefront Items
- Log into the storefront (see Access the Storefront).
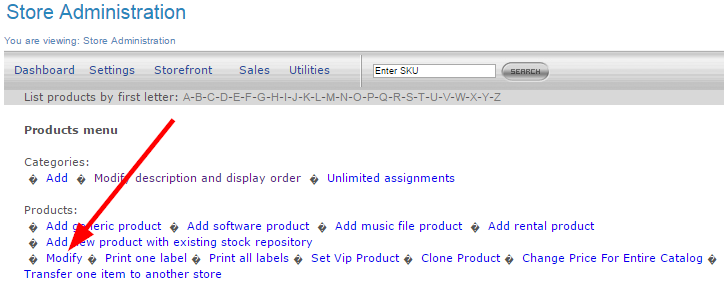
- Select 01 Products from the main menu to open the Product Menu.

- Select modify under Products.
- To view any item added to the storefront, enter a search term, such as the name of the product and then select Search. To view an item that is not placed within a category, you need to use the search feature.
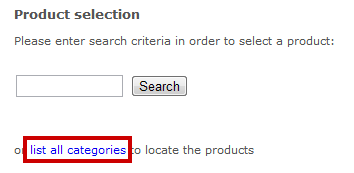
- To view all items within a category select List all Categories and then select a category.