Media Libraries
Download ManualMedia libraries store course digital files. Media Library tools let you upload materials to the LMS for use in course creation. These materials can be documents, images, multimedia files, and more.
There are two types of media libraries:
Local Media Libraries are located within each product. These libraries hold files that can only be used in the specific product that the library belongs to. Local libraries are available in all products that a course author can access. Site Managers may access any local library.
- Log in with a course author or Site Manager account.
- Open a product and edit any asset or the introduction page.
- From the edit screen, select Media Library.
- For course authors, the Media Library is in the left panel.
- For Site Managers, select the Media Library tab on the right. If you can't see the tab, show the Tool Panel.
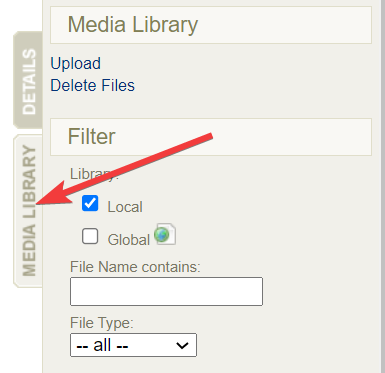
- Optionally filter by file type or file name and then select Go at the bottom of the filter. If you can't see the filter menu, show the Tool Panel.
- Select the name or image of a file to open it or download to your computer.
- Manage the files in this library using the options menu, including uploading and deleting files. If you can't see the menu, show the Tool Panel.
- The Manage FTP tool for uploading large files is also located here, if configured for your site.
![]() This feature is available to Site Managers.
This feature is available to Site Managers.
The global media library houses files accessible to Site Managers. Files stored in this library can be used in any product and where ever there are content editor pages throughout the system.
- Log in with a Site Manager account.
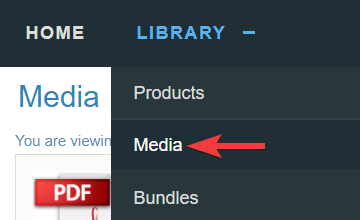
- Select Media from the Library tab.
- Optionally filter by type or name and then select Go at the bottom of the filter. If you can't see the filter menu, show the Tool Panel.
- Select the name or image of a file to open it or download to your computer.
- Manage the files in this library using the options menu, including uploading and deleting files. If you can't see the menu, show the Tool Panel.
- The Manage FTP tool for uploading large files is also located here, if configured for your site.
Upload Files
![]() This feature is available to Site Manager and Course Author accounts, depending on system configuration.
This feature is available to Site Manager and Course Author accounts, depending on system configuration.
Media files must be uploaded to the LMS before you can insert them into a product or asset. A wired connection is recommended to avoid connectivity issues when uploading anything but small files.
![]() Files that exceed 75 MB can be using the Manage FTP tool (see below), if available for your site, or create a ticket to have an LMS Administrator upload the file for you.
Files that exceed 75 MB can be using the Manage FTP tool (see below), if available for your site, or create a ticket to have an LMS Administrator upload the file for you.
- Navigate to the appropriate media library.
- Select Upload in the media library menu. This page displays information about files sizes and supported files types.
- Select Browse/Choose File to locate the file you wish to upload.
- Optionally enter a new file name in the Filename field. If a file with the same name and extension already exists, you will be asked if you wish to overwrite the existing file.
- Select Continue to upload the file. During the upload you will see a progress bar that displays the status of your upload.
- Optionally upload another file or press continue to return to the product you were working in.
- If you uploaded an image, you will also have the option to resize it. Images over 700 pixels wide will be automatically resized.
You can zip multiple files and types to upload them as a single .zip file. Zipped files keep their original size when uploaded in zipped format. See Zip and Unzip Files. See also FTP File Upload below.
- Navigate to the appropriate media library.
- Follow the steps to upload a single file above, selecting a zipped file. The system will recognize zipped files and prompt you to choose an upload method.
- Select Leave as one zip package of files and place in the documents folder.
- Select Unpack files into the media library to move them to the categories (audio/video, documents, images, and templates).
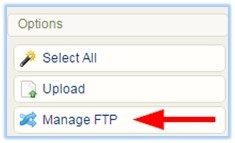
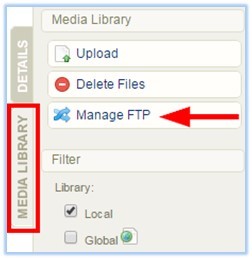
The FTP tool is available for uploading files that exceed 75 MB and for moving multiple files at a time. Manage FTP is located under the options menu in the global media library and under the media library menu in local media libraries.
![]() You must be provided with FTP protocols for Host, Username, and Password to access the LMS FTP.
You must be provided with FTP protocols for Host, Username, and Password to access the LMS FTP.
FTP Setup
- Use of an FTP program to transfer files to the LMS FTP folder is necessary (e.g., Filezilla. Here’s a link to a video that shows how it works). It is recommended that clients work with their IT department to setup an FTP program based on their company’s internal policies.
Manage FTP
- Navigate to the destination media library.
- Select Manage FTP.
- Located under the Options menu in the global media library.
- Located under the media library menu in local media libraries.
- Located under the Options menu in the global media library.
- From the list of files in your FTP folder, select a file to transfer to the media library you are in.
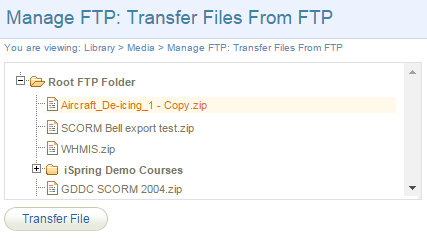
- Select the Transfer File button.
- Select an import file option.
- Select Continue Transfer.
Delete Media Files
![]() This feature is available to Site Manager and Course Author accounts, depending on system configuration.
This feature is available to Site Manager and Course Author accounts, depending on system configuration.
- Navigate to the local media library within the product that contains the files to delete.
- Select Delete Files in the media library menu.
- Select the file type from the Select Section drop down.
- Select one or more files to delete and then select Delete.
- A prompt will ask you to confirm the deletion.
![]() This feature is available to Site Manager accounts.
This feature is available to Site Manager accounts.
- Navigate to the global media library.
- Select files to by highlighting them.
- Select Delete Selected in the options menu.
- Use your FTP client to remove files that were uploaded via FTP.
- A prompt will ask you to confirm the deletion.