Product Types
Download Manual![]() This feature is available to Site Managers depending on system configuration.
This feature is available to Site Managers depending on system configuration.
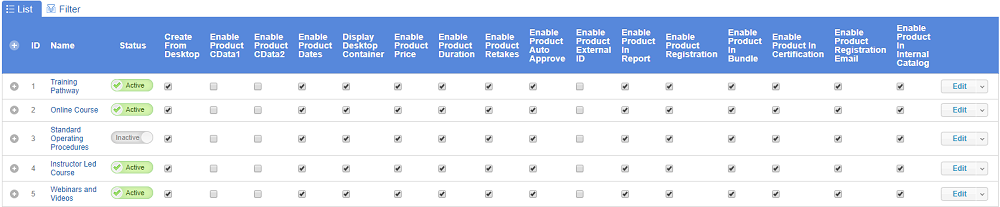
Up to 10 product types can enabled. Site Managers can create and edit the different product types as well as enable or disable the asset types available for creation within each product type. Products of the same type are grouped together into a container displayed on the home page. If a user has no enrolments for that type, the container will not appear on their home page.
Create and Define Product Types
![]() This feature is available to Site Managers depending on system configuration.
This feature is available to Site Managers depending on system configuration.
- Create a Product Type Name
- Log in with a Site Manager account.
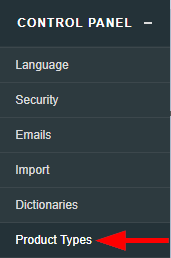
- Select Product Types from the Control Panel menu on the home page.
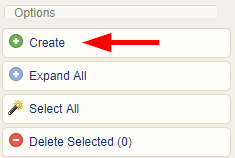
- Select Create from the Options menu. If you cannot see the menu, show the Tool Panel.
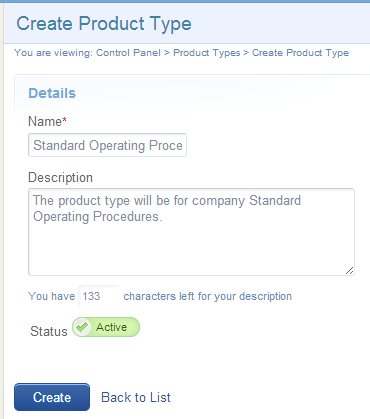
- Fill out the form by with the new product type name, an optional short description, and set it to active or inactive. An active status allows creation of this product type. An inactive status disallows creation of this product type and makes any existing products of this type unavailable to enroled individuals. You can change these choices at any time by selecting edit for the applicable product type.
- Select the fields available when creating or editing the product type. Insert a check mark for each allowable field.

Field Description Create From Desktop Allow course authors the ability to create this product type (e.g. Publishers). If not selected, then only Site Managers can create this product type. Enable Product CData1/CData2 Show the custom input fields Data1 or Data2 in the product's Edit Details area. Enable Product Dates Allow the option to apply publishing dates. Display Desktop Container Make this product type appear in a container on the home page when logged in with non-site manager accounts. Enable Product Price Allow the option to enter a price. Note that this is not an eCommerce feature. Enable Product Duration Allow the option to apply an expiry. Enable Product Retakes Allow the option to allow retakes. Enable Product Auto Approve Places the Automatic Approval toggle on the product edit/create pages. This allows course authors to determine which products have automatic enrolment and which require supervisor approval. Note that this should not be enabled for systems that automatically enrol based on user group or use the eCommerce storefront feature. Enable Product External ID Show the External ID field in the product's Edit Details area. Enable Product In Report Allow this product type to be available in reports. Enable Product Registration Make the product type available for enrolment. Enable Product In Bundle & Enable Product In Certifications Allow this product type to be available in for bundles and certifications. Enable Product Registration Email Allow this product type to send product registration email alerts. Enable Product in Internal Catalogue Allow this product type to be shown or hidden from the course catalogue. - Expand the product type to define the assets available to this product. Insert a check mark for each allowable asset.

- Update the corresponding product type labels within dictionaries. The name created on the manage product types page does not change the default system name; you must also change the dictionary labels. The ID number on each product type identifies the label to define in the dictionary. The variable label names are as follow:
- product_1, product_2, etc.
- product_1_plural, product_2_plural, etc.
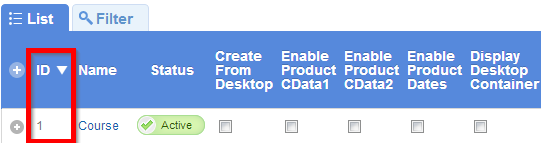
In this example, the course product type is ID 1.
The variable label, product_1, is defined as Course.
![]() For more information on how to define dictionary labels, please see Languages and Dictionaries.
For more information on how to define dictionary labels, please see Languages and Dictionaries.
Delete Product Types
![]() This feature is available to Site Managers depending on system configuration.
This feature is available to Site Managers depending on system configuration.
- Log in with a Site Manager account.
- Select Product Types from the Control Panel menu on the home page.
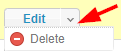
- Select the drop-down arrow on the Edit button.
- Select Delete.
![]() You can only delete product types that have no products attached to them.
You can only delete product types that have no products attached to them.
If you try to delete a product type where products of that type exist, then the deletion tool will notify you that it cannot be deleted.
Change Product Type
![]() This feature is available to Site Managers depending on system configuration.
This feature is available to Site Managers depending on system configuration.
- Log in with a Site Manager account.
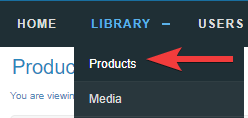
- Select Products from the Library menu on the home page.
- Select a different product type from the Type drop down menu for any given product.

![]() There may be restrictions when changing a product type. This can occur when the destination type and the original type have very different configurations. The system will let you know if this is the case.
There may be restrictions when changing a product type. This can occur when the destination type and the original type have very different configurations. The system will let you know if this is the case.
Product Revision Log
![]() This feature is available to Site Managers depending on system configuration.
This feature is available to Site Managers depending on system configuration.
You can view the revisions that have been made to a specific product. The log identifies the name of the product or asset the date the change was made, who made the change, and what account type they are.
- Navigate to products.
- Select a specific product to open it.
- Select Revision Log from the Properties menu. If you cannot see the menu, show the Tool Panel.