Manage Report Access
Download Manual![]() This feature is available to Site Managers depending on system configuration.
This feature is available to Site Managers depending on system configuration.
The report access feature lets you determine which reports are available to specific user types and campuses. The report access page shows the reports available for your system and the user types that are configured to run those reports. To enable a report that is not available on your system, create a ticket using the Service Request System (SRS) to request the report.
- Log in as a Site Manager.
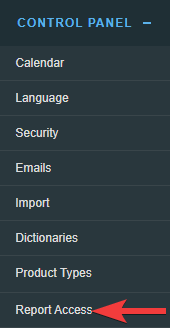
- Select Report Access from the Control Panel.
- Optionally apply Filters.
- Use the check boxes to enable or disable report access for each user type. Each report is listed on a separate row.
This example of the reports access page shows Publisher and Campus Manager accounts cannot run report R101. 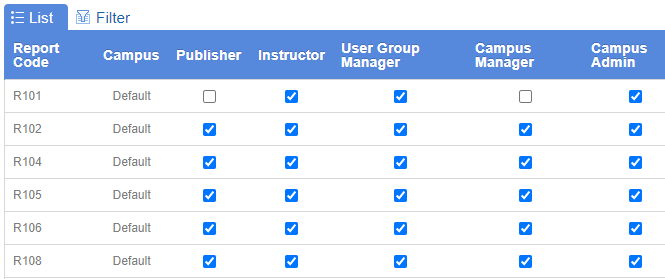
Enable or Disable a Report for a User Type
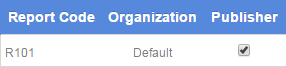
To enable a report, ensure that the box is checked under a user type. In this example, Publisher user types can run R101.
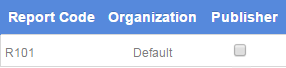
To disable a report, ensure that the box is not checked under a user type. In this example, Publisher user types cannot run R101.
Enable or Disable Reports for a Campus
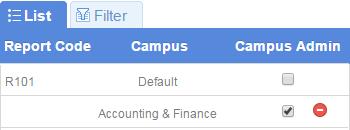
Site Managers can restrict report access at the campus level. For example, you can have R101 disabled for a campus, except for Campus Managers.
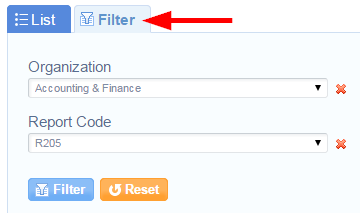
- Create Exception from the Options menu. If you cannot see the menu, show the Tool Panel.

- Select Campus
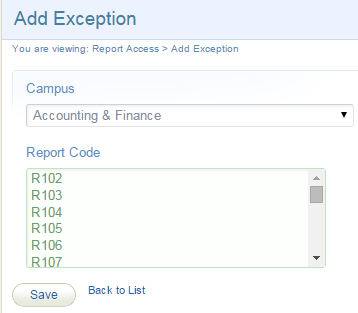
- Select Report Code.
- Save.
- On the Report Access page, enter a check mark to select the user type in the campus that is allowed to use the report. In this example, the user type is called a Campus Admin. You can delete the exception by using the delete icon.