![]() This feature is available to Site Managers depending on system configuration.
This feature is available to Site Managers depending on system configuration.
This tool is used for migrating user groups from one campus to another while maintaining relationships between campuses, user groups, access codes, classifications, and users. To navigate to the Migrate User Groups tool, log in as a site manager and then select the users tab, then users, and finally the migrate link under the Tools menu. The wizard guides you through the steps and options for moving the users in migrated groups. Your current step is highlighted and you can navigate through the steps by selecting a tab at the top.
- Log in with a Site Manager account.
- Select User Groups from the Users main navigation.
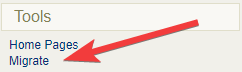
- Select Migrate from the Tools menu to open the User Group Migration wizard. If you can't see the menu, show the Tool Panel.
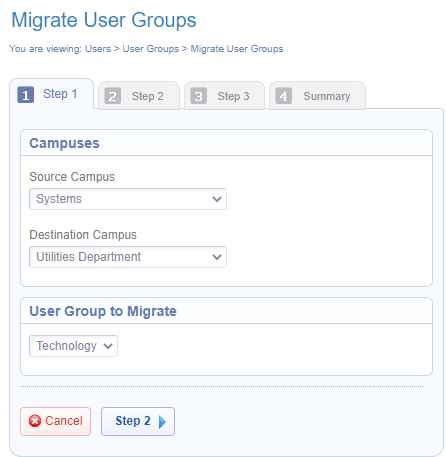
- Wizard Step 1: Select campuses and user group. Use the drop-down menus to:
- Choose the source campus. This is where the user group currently resides.
- Choose the destination campus. This is where the user group will move.
- Choose the user group to migrate.
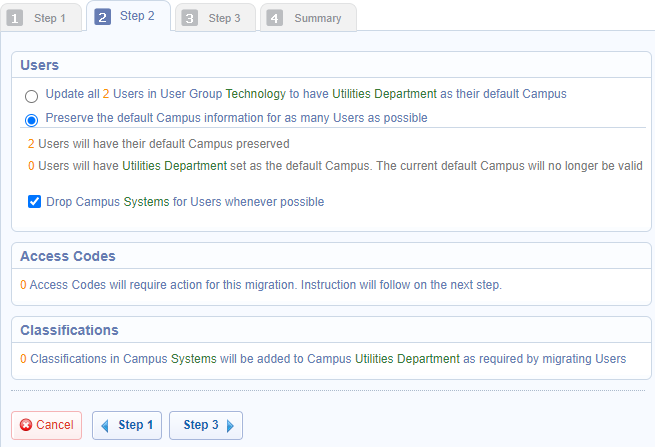
- Wizard Step 2: Decide on default campus. You have two choices: update or preserve the default campus.
 Changing the default campus can affect system relationships. Use caution when changing the default campus, especially if your system uses single-sign-on (SSO) or has an integration with a 3rd party system. Changing the default campus can affect system relationships and determine which theme (skin) is applied and which language and email alerts an account sees.
- Update the default campus. When you move the user group to a different campus, you might also want to update the default campus. The tool will check for users registered into that user group and if so, you can update their default organization as well.
- Preserve the default campus. Users may belong to multiple user groups and even though you are migrating one of them, you can opt to preserve their existing user group / default campus relationship. You also have the option to remove the source campus from the user accounts whenever possible by selecting the check box for Drop Campus.
- This step will also identify any access codes or classifications that will be affected.
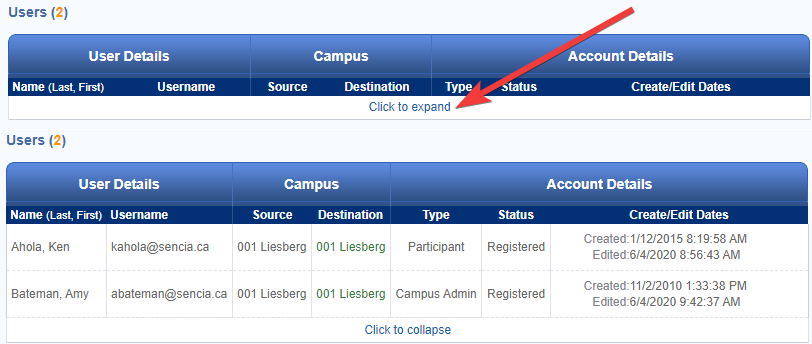
- Step 3: Review changes to users’ default organizations.
- Expand the users to review changes.
- Systems that use access codes must choose all the access codes that must be migrated.
- Systems that use classifications must choose any classifications that must be migrated.
- Select Submit at the bottom of the poage when ready to compelte the migration.
- Expand the users to review changes.
- Step 4: Summary and confirmation of changes. The migration is complete and you will see a summary of what has been changed. A log of the changes is available in CSV file format.