The scheduling tool has an optional waitlist that you can enable for a scheduled session. The waitlist can be set with a maximum number of people allowed on the waitlist, as well as cut-off dates. Individuals to the waitlist can be manually moved from the waitlist to active enrolment by the instructor or other user type with the permissions (e.g. a Site Manager).
Navigate to a Waitlist
The waitlist lists all waitlisted users for the session as well as their position on the waitlist.
- Navigate to the Scheduling Tool.
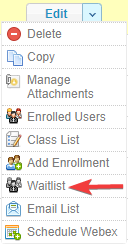
- Select Waitlist from a session’s Edit split button. If it's not visible, hide the Tool Panel.
- Optionally Export the list.
- Edit a Scheduled Session.
- Select the checkbox in front of Enable to create a waitlist for this session.
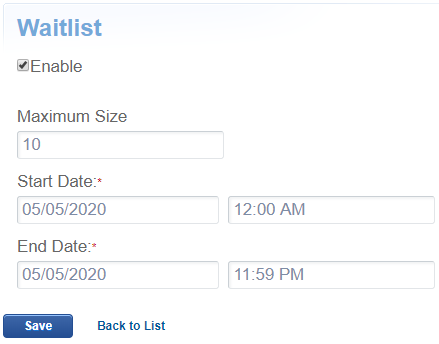
- Enter a number for the Maximum Size. This will limit how many users can be waitlisted.
- Enter the Start/End Date and optional times that a user can be waitlisted. A best practise is to prevent users from being waitlisted too close to the start of the session (e.g. two days before the session is scheduled).
- Save.
![]() An individual may only belong to one waitlist per product. If an individual is enroled to another waitlist for the same product, they are removed from their previous waitlist.
An individual may only belong to one waitlist per product. If an individual is enroled to another waitlist for the same product, they are removed from their previous waitlist.
Move enroled users to the waitlist.
- Navigate to the waitlist.
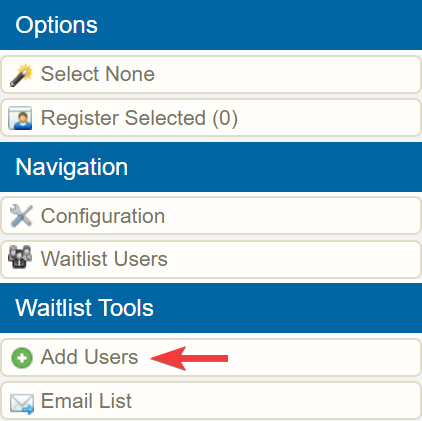
- Select Add Users under the Waitlist Tools. If you can't see the menu, show the Tool Panel.
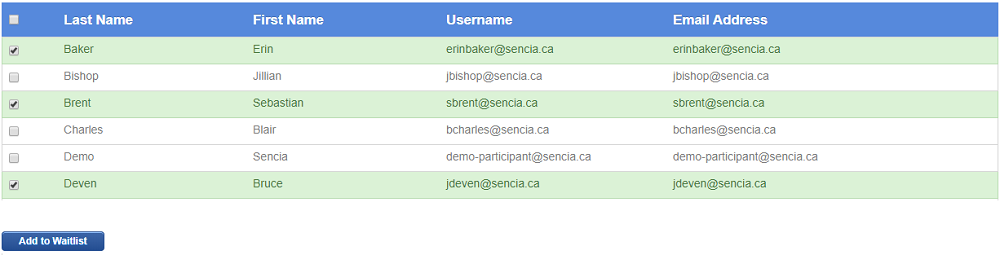
- Optionally use Filter and Save Searches to locate specific enroled users.
- Search. If you did not apply filters, all users enroled in the session will be listed.
- Select the checkbox in front of each user you wish to add to the waitlist.
- Select Add to Waitlist at the end of the list of users.
![]() When enroling a user from the waitlist list, the system does not account for the session's maximum attendance. This is to give flexibility to special cases where adding users above the seat limit for the scheduled course may be applicable.
When enroling a user from the waitlist list, the system does not account for the session's maximum attendance. This is to give flexibility to special cases where adding users above the seat limit for the scheduled course may be applicable.
- Navigate to the waitlist.
- Select the users you wish to enrol.
- Select Register Selected under the Options menu. If you can't see the menu, show the Tool Panel.
Individuals removed from a wailist will not be enroled in the session. You may wish to enrol users from the waitlist instead (see above).
- Navigate to the waitlist.
- Select the users you wish to remove.
- Select Remove Selected under the Options menu. If you can't see the menu, show the Tool Panel.
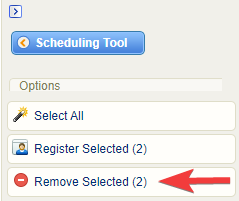
- Confirm.
There are two automatic email notifications related to the waitlist that may be in use by your system.
- Added to Waitlist emails are sent when:
- An administrator adds a user to the waitlist
- A user adds themselves to a waitlist
- Removed from Waitlist emails are sent when:
- An administrator removes a user from a waitlist
- A user removes themselves from a waitlist
- An instructor removes a user from the waitlist